
COME FLY WITH ME
(FLY TYING WITHOUT TEARS)
BACK TO TABLE OF CONTENTS
STEP BY STEP
THE BUZZER
THE LEECH
INTRODUCTION
I always buy my flies - I don't have the time to tie them for myself. That's the excuse I used for years - and I believed it. The day arrived when the experience I had developed told me that the fly I needed was not available in the store. What now? With great trepidation I made the decision to try and do-it-myself. And, guess what? It wasn't half as bad as I thought it would be.
One thing that I realised quite quickly - there are two types of flies. There are those that are designed to catch fishermen and there are those that are designed to catch fish! There is no doubt that the works of art that are admired for their technical excellence are truly magnificent. Fly tying can become a hobby in itself, eventually becoming divorced from the original intent - which is to make an artificial bait sufficiently realistic to fool the fish. I have neither the time nor the dexterity to make up these beautiful "life as art forms".
After a lot of sticking hooks in my fingers, supergluing myself to myself, watching rolls of thread unravel across the floor and a hundred other things that could go wrong, I finally worked out some easy ways to get the job done - and the job is to make a fly that is a generic form which will serve a variety of purposes. We can leave the imitator flies - those that specifically imitate one particular type of living creature - to the specialist. We just want to make up something that can be a fly for all seasons - if you'll forgive the pun.
If, on the other hand, you want to develop your skills to a higher level then use this introduction to give yourself a good foundation before moving on to the more specialist methods that will be found elsewhere. I believe that what is offered here will suffice the vast majority of people and supply more than enough information to overcome the initial fears that most would-be fly tiers encounter.
GETTING STARTED
HOOKS
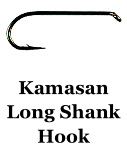
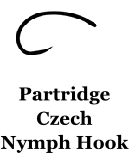 The first items you need are some hooks. There are a number of first class hook manufacturers, including Kamasan and Partridge. Be very wary of unnamed or bulk order hooks. They are likely to be cheap for a very good reason. They will either rust in a week or straighten as soon as a fish attacks them. Forged hooks are much stronger and will keep their shape and sharpness. Having said that, there are occasions where a wire hook is the right tool for the job.
 If you are hunting the monsters that inhabit the deeps of big lakes, reservoirs or stocked venues, then a forged hook is the order of the day. A wire hook would likely bend and straighten under the pressure of these big fish. But a wire hook will suit when small trout or grayling are on the menu. Indeed, when dry fly fishing a wire hook has the advantage of being much lighter, so needs less buoyancy to keep it afloat. Select the hook to suit your fishing circumstances. Incidentally, a forged hook is usually dark brown in colour, whereas wire hooks are silver or gold.
You should also give consideration to what sort of fly you are going to tie. The shank length and shape, the roundness of the bend, whether it should be up-eye or down-eye are all things to take into account.
Up-eye hooks are used almost exclusively for dry flies as they attempt to keep the leader and knot out of the water, so enhancing the silhouette of the dry fly, which, as we shall find, is what a dry fly depends upon. A long shank hook is ideal for tying lures and streamers where you want lots of body to imitate a fry fish. An enhanced roundness to the bend of the hook with a very short shank will effectively emulate a pupa. Most hook tying instructions will tell you what hook to use, sometimes even down to the manufacturer and design number. But you should be getting the general idea of ensuring that the hook you use is appropriate for the fly you are intending to tie.
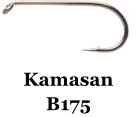 The tying instructions for many flies include a specific hook and its manufacturer’s product code, for example “Kamasan B175”. This won’t mean much to you, but a quick look at one of the online tackle suppliers should show you pictures of the fly hooks, so if you don’t have the exact one in your fly-tying box you may have one that is very similar.
Incidentally, you should keep a hook sharpener (like a small file) with you when you are on the water. A blunt hook is likely to let you down at the critical moment. The hook is the only part of your equipment that will actually come into contact with the fish, but it seems to be the part that gets the least care, attention and service. As mentioned, each fly has its own hook pattern and we will deal with that when describing the fly.
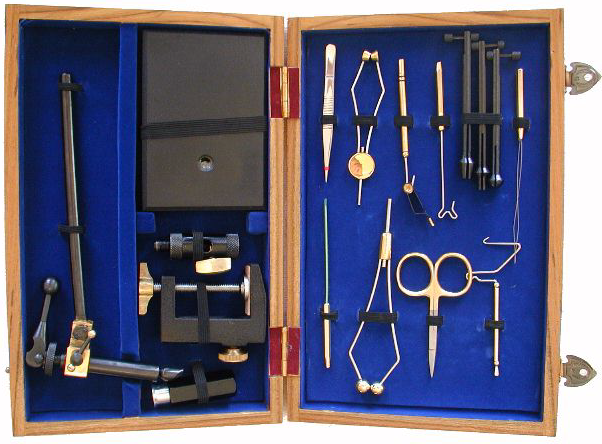
You will need to make an investment in the hardware that is used in fly flying. Some shops and internet sites offer package deals, including all the basic items along with some of the most commonly used materials. This is a fine way to get started as it ensures that you are at least buying what an experienced person considers you will require. We'll go through the basic items, so that you can get a grasp on what they are and what you do with them.
TOOLS OF THE TRADE
 Vise - In Britain it’s called a vice. This is the basic tool and is used to hold the hook while it is being worked on. There are free standing versions, with a heavy base to keep them steady, and those with a clamp for securing them to the edge of a table (don't forget to protect the table from the indentation that it will make). The way they work is to use two small jaws to hold the hook securely. That jaw may be spring loaded or tightened with a screw. Some have gimbals to alter the angle of presentation. It's back to - you get what you pay for. I use a heavy based version that I can easily work on at my desk and then move to one side if the phone rings. That way fly tying becomes a fill-in activity, rather than having to make the commitment of getting everything ready before you start.
The latest fly tying vises incor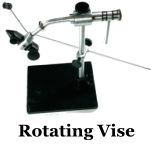 porate the ability to rotate around the axis of the jaws. This is extremely useful when dressing certain flies that need working on from several directions. It removes the need to take the fly out of the vise to reposition it at critical times in the construction process.
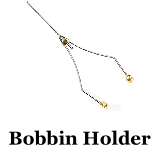 Bobbin Holder - This is what holds the thread as you use it from the reel. It consists of a
  pair of sprung jaws that hold the reel and a small tube through which the thread passes. This enables you to leave the thread hanging in the bobbin while working on other parts of the fly. In some flies you may be using two bobbins with different materials at the same time, so you'll need at least two of these, but they are inexpensive.
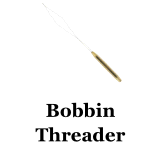 Bobbin Threader - This is a piece of fine sprung wire in the form of a loop attached to a small handle. It is used to pass the thread through the tube of the bobbin. Simply pass the wire through the bobbin tube, put the thread through the eye of the wire and pull it back through the bobbin tube.
Bodkin - Also called a dubbing needle, this is nothing more than a big needle with a handle. It h as a multitude of uses. It can be used for pushing thread or material into the right position, removing dried glue or varnish from hook eyes, spreading glues and other liquids as well as numerous other tasks.
Scissors - A pair of small sharp scissors is essential. They should be needle nosed so that you hav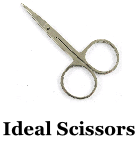 e maximum control over where you are cutting. Keep them sharp and make sure they are free from glue or other contaminants. I would suggest a second pair of scissors for heavy duty work such as cutting tin foil or other items that are likely to quickly blunt a fine edge.
Hackle Pliers - These look like a circular spring where the two ends of the spring come together to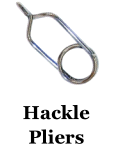 form two small jaws. They are used for holding small pieces of thread or other material, particularly pieces of feather for presentation to the hook during make-up. Because they are effectively spring loaded they can be used to hold an item in place, thus freeing your hands for other tasks.
Fly Stand - If you leave flies lying aro und while they dry you invite them to get lost and it is inevitable that the wet glue or varnish will find things to stick to other than the fly. The stand keeps your flies upright by holding each one in a small loop which holds the fly by the hook. The stand comes in five or ten fly models so you can decide just how busy you want to be.
Magnifying Glass - Many people benefit from 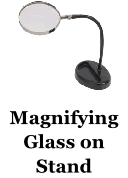 the added advantage of using a magnifying glass while working on smaller flies. The best type is mounted on a base so that it can be positioned and left in place while working and has a flexible arm. Some have built in lights to illuminate the exact point of focus.
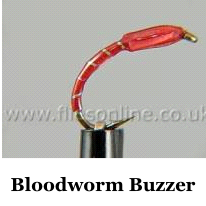
Whip Finishing Tool - This gizmo comes in all shapes and is used to  make the final tying off of the thread an easier operation. All finishing knots are basically a half hitch with several turns and some people find it easier to use a tool to achieve this. I developed a technique using my fingers that did the job simply and effectively. I'll explain this in the section on tying up the Bloodworm Buzzer. However, for those who want to use the tool I’ve found a few video clips of how it’s done.

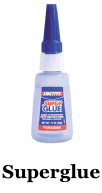 Glue - There is no doubt that superglue is the best glue for general use in fly tying. Be careful - it will happily glue anything it comes into contact with - including you. Only a very small quantity is required. A word of caution - superglue is manufactured from cyanoacrilate, which has the poison cyanide as a base ingredient. It works by reacting with the moisture in the material. If the item you are gluing is very wet this reaction can be quiet robust and will give off poisonous fumes. Avoid breathing in those fumes. It will also generate a considerable amount of heat, which can weaken the materials you have used, so make sure your tyings are dry before you glue them up. Many prefer the use of varnish to finish off and waterproof their flies. I use superglue to do this job and get the added advantage of gluing everything in pace at the same time. Left to dry, superglue will give the same lustre as varnish to a finished fly. Having said that, there are some flies where the varnish coating is an integral part of the fly, as in some buzzers which have several coats of varnish applied to impart a deep lustrous effect. There are several types available, from thin and runny to thick and slow. Make your own choice.
Finally, here’s a very useful video that introduces many of the tools described above and gives a good idea of how to use them.
MATERIALS
There is no end to the inventiveness of fly tiers when it comes to finding new ways of using materials in their art. Over the years I have experimented using ladies hair dye to colour fur, tried out all sorts of tools and implements and played with anything that looked interesting to help me achieve an end result. Part of the entertainment is working out new ways to solve a problem. The specialist material suppliers have probably already thought of it, so it's worth having a look in their catalogues or online web sites. Most things will be readily available in your local store, such as thread, glue, etc.
You will be surprised how you suddenly become convinced that only a particular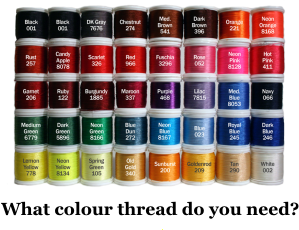 shade of thread or specific texture of material will do. I have seen all sorts of materials used in the most exotic ways. Silvery plastic or holographic sweet/candy wrappers can be used to make the wing cases of buzzers to imitate pupae. Bits of mothers knitting yarn can be used to make a body of a bug imitation - you get the idea. An example of inventiveness came when I wanted to make the foam eyes that are the signature component of a booby. The tube of closed cell foam available in the shops was too thin in cross section for the flies I wanted to tie up. I purchased some sheets of foam, also known as plastazote, through mail order. I then had the challenge of how to make tubes of the right thickness from this sheet. The answer I came up with was to take the metal outer casing from an old fountain pen and clamp this in the jaws of my electric drill. Slightly sharpening the edge of the casing with a file I was ready for action. I drilled through the foam into a piece of wood (not the kitchen work surface!) as a backstop and, hey presto, I had a tube of the right diameter cross section. I used a needle to tease the tube out of the body of the pen. Use your imagination to solve your own fly tying challenges - it's part of the fun.
For the most part, try sticking to easily available items - they really will work just as well. At ten feet down in murky water I'm not sure the trout will be holding up score cards for technical merit in your fly construction! Either it looks good enough to eat or it doesn't. What is more important is giving the fish what it expects, and that is as much about movement as it is about appearance. And that movement is created by the material you use and the way you move the fly through the water.
On several occasions I have mentioned how I caught the majority of my fish using just three flies. Those are the three flies I am going to describe making in detail. Remember, this is all about what has worked for me consistently over the years. All experienced fly fishermen will want to advocate their own rod/reel/line/leader/fly/etc/etc. It's up to you to decide what works for you. Try my ideas as a starting off point and develop your own techniques from there.
 The object of the exercise here is to get some flies made that are generic. They are not meant to imitate any specific life form. Rather they are so general in their appearance that they will serve their purpose in many situations. For those of you who want to progress your fly tying skills to the next level and beyond there are many books and web sites that will serve you well. You can also check out the fly tying videos links that appear later - they are superb and will help you when you decide to take the next step. My first priority has always been to do what it takes to catch fish with the minimum of effort. Some may call that laziness - I like to call it maximizing my cost benefit analysis!
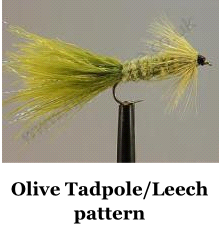
The three flies I want to introduce to you are the buzzer, the leech and the booby. The leech is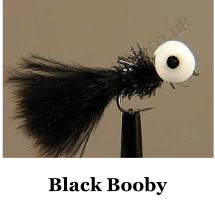 also known as the tadpole and the buzzer form I use is also known as the bloodworm. Getting acquainted with these three flies will give you a great grounding in fly construction as well as giving you a wide field of use for the minimum of effort. Let's start with the easiest of the three, the buzzer. I'm going to assume that you've never tied a fly before, so I'll make everything as simple as I can.
You will notice that the Bloodworm Buzzer is the simplest and easiest fly to tie and the leech develops this by adding just the simplest body to it. The Booby takes this stepped approach one stage further by adding a set of eyes and the option of a different tail and body. Once you have mastered these simple techniques you can experiment with new ideas of your own. The great advantage of this generic approach is that you can tailor make your flies to suit the fauna that you observe on your own waters.
 As you develop your talents you will want to try new and innovative ideas - or stick to the patterns that you know will work. I stuck with my three ideas for nearly all my fishing expeditions once I had tried the experimentation phase. I still recommend that you try it all. Tying a fly in your vise before you go fishing and catching your quarry with it a few hours later is a deeply satisfying experience.
First let's sort out the different parts of an imitation fly so that we know what we are talking about. Again, some of this will be blindingly obvious to the experienced but please remember that even you had to hear it for the first time! This brief introduction is built upon later, but for now let's sort out what each part of the imitation fly is and does.
The following descriptions are more fully explored later, but for now we just need to get acquainted with the language of fly tying.
THE HEAD
Although this is the first thing we look at when starting from the eye of the hook, it is actually the last part of the fly to be made. This is where the thread is finally tied off after securing all the other parts of the fly in place. Usually the thread is wound round a number of times to build up a bulge which is then covered in superglue or varnish to harden it and protect it while in use. In some creations other elements can be incorporated into the head, such as wing cases or spun deer hair as in the muddler minnow.
THE BODY
This is the main part of the fly and normally dictates what the fly is intending to imitate, whether that be a fry, fly, buzzer, etc. Materials can range from simple thread for a buzzer to large pieces of fur for a fry imitation. The body can the smooth and shiny like the scales of a small fish or bulky and shaggy like a large nymph. Fritz, chenille, wool, palmered feathers (I’ll explain what that is later) - it just depends how inventive you want to be.
THE WING
Most wings are designed to be imitative of the natural insect. This is most important in wet flies and dry flies where shape is more important than movement. Matched slips of duck feathers are used to make the wings which are tied in at the head. Specific feathers are suggested in many tyings to most closely resemble the fly that is being imitated. The other use of a wing is to add extra movement to a fly by introducing another point from which a flowing material like marabou can originate. This is shown in such flies as the cat's whisker.
THE RIB
A rib is a length of wire, thick thread or other material such as Lurex which is wound in equally spaced turns along the body. This can imitate the segmentation of an insect body. It can add weight to make the fly sink more rapidly as an alternative or in addition to under-body lead wiring. A rib can be made from sparkling or flashy material to imitate the air trapped around the body of some insects. A rib can also be used to add durability to a fly by holding everything in place along the length of the shank.
THE TAIL
Tails come in two varieties - form and function. The first type aims to simulate the actual visual interpretation of the tail of an insect such as the three whips found on the tail of a mayfly nymph. In dry flies the tail also acts as a stabiliser, balancing the fly in the water and helping it to float. Stiff materials are used to keep their appearance in the water. The second type of tail is intended to give the maximum idea of movement in the water. Such materials as marabou or arctic fox fur are used which undulate sinuously when pulled through the water, giving the impression of a fish swimming or a leech wriggling in the water.
THE HACKLE
Tied in at the head of the fly on most creations, the hackle simulates the legs of some insects, while in other offerings the idea is to give bulk to the fly. In dry flies the hackle adds buoyancy, while in wet flies it is the ability of the hackle to become rapidly waterlogged that is required. Thus it is important to ensure that the correct material is used when tying up a hackle. Cock hackles are stiffer and lend themselves to water resistance, while hen hackles are softer and more porous. As an addition, some flies are tied with a hackle wound along the entire length of the shank as well as a rib. This extra hackle adds substantial bulk to the body and is known as a palmer. Depending on the material used, this palmer can add extra buoyancy in a dry fly or a pulsating action in a wet fly.
Now let’s start tying some flies!
***