ACCESSORIES
BACK TO TABLE OF CONTENTS
We've discussed the main elements required to get you catching fish - rods, reels, lines and leaders, but there are numerous other items, some essential some desirable, that you will need as you go along. We'll look at the additional pieces of hardware and then look at the ideal clothing and other apparel.
LANDING NETS
A landing net is an essential item, even if you are going to release your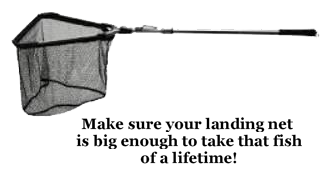 fish. You might think that it would be simple just to reach down and remove the hook once the fish has been played out, but my experience tells me that even an apparently exhausted fish has a final lunge just at the last moment. That dive for freedom could be the difference between returning the fish to fight again or seeing it break your leader at that critical instant. And that final burst could also be sufficient to kill the fish from exhaustion. There is no doubt that many fish die after being returned to the water because they were played for too long. Early netting and release gives them a better chance of survival. And that means being firm when playing your fish - you should be in charge.
On a “catch and release” water a net is the only way to make sure you can control the fish while unhooking it. Here the easiest way to release the fish is to unhook it while it is still in the net and then simply return the net to the water and turn it inside out. The fish will then be free to swim away without you ever touching it. However, if you think the fish is exhausted or lies on its side when you attempt to release it then you should give it some help in recovery before letting it go. Hold it gently between your hands and point its head upstream. Let the current run past its gills so that it gets a fresh supply of water to them. On a still water gently move the fish back and forth in the water to force the water past its gills. After a few moments the fish should kick and swim off.
On a “put and take” water (they put the fish in, you take them out and take them home) a net is equally important. I believe that it is more humane to bring the fish to the rod and net it before despatching it. In this way you can use the net to hold the fish while delivering the coup de grace - it never has the opportunity to slip out of your hands and into the bottom of the boat - or worse back into the water!
Either way a net is a necessity. A knotless mesh net is mandatory on many waters. This type of net does not have knots to form the mesh, knots which could scar the fish and dislodge its scales. Abrasive nets will scrape off the mucous membrane that coats the fish. That membrane is believed to contain antibacterial ingredients that help the fish ward off infections. The new type of mesh is smooth and less injurious to the fish. Buy a net which is wide and deep. I know of an occasion when the fish of a lifetime was lost because it was too big to get into the landing net! Every water has the potential to hold a fish much bigger than you'd imagine - don't spoil your chance of catching a monster for the sake of saving a little money when buying your landing net.
Most nets are collapsible in one way or another. I have found that the nets made with a tubular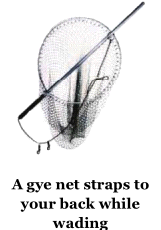 construction are more robust than the ones made from strips of metal that can easily bend and warp. My favourite one has a handle that slides through the frame at the neck of the net and has a spring clip to locate and hold it in the open position. Keep to metal construction - fibreglass may seem light and useful, but they will not stand up to the knocks and stresses that a well used landing net has to put up with.
When wading, a long handled net can also be used as a wading stick and some come with a pointed end so that it can be stuck in the river bed when not in use. However, many prefer a short handled net or Gye net when wading. There are many types available and most will come with a cord or hook so that it can be stored on your back when not in use. Most have a wooden frame which will need waterproofing with varnish from time to time.
FISH BAGS
Once you have caught your fish you will need to keep it in something while you carry on fishing. Just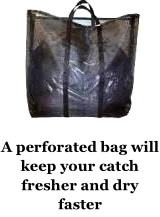 leaving it lying in the bottom of the boat or on the bank will ensure that it shrivels up and starts to go off in very quick time. A plastic supermarket bag or the like will make the fish go off even quicker as it traps water and heat and stops any circulation. The ideal answer is a perforated bag, which can be hung over the side of the boat or left in the water by the river bank. The perforations will ensure a continual supply of fresh water passing over the fish which will keep it in best condition.
Bass bags are made for this purpose and, while some are made of hessian, the best ones are made of a knotless mesh similar to the material that landing nets are made of. The hessian bags will rot quite quickly, whereas the mesh bags are made of a synthetic material that will not rot. Whichever you use it should be rinsed very well after use and allowed to dry or else it will smell. It should be kept in a sealable plastic bag when not in use or the smell will soon become noticeable. Make sure the bag is secure when hanging it over the side of the boat - even a small wave can be enough to lift it off the rowlock and consign it and its contents to the deep.
The alternative solution to keeping your fish is with a stringer or fish clips. I have tried a couple of these and both types have a tendency to unclip, allowing your hard won prizes to slide off and disappear - that really did happen to me once when I was trying them out. Six fish over the side of the boat and - hey presto - at the end of the day they had all disappeared! Clips can also be unwieldy when trudging back to your car with all your other gear. Having half a dozen fish slapping around and getting in the way can be quite annoying. Better to have them in a bag from the start.
And while we’re on the subject of bags, you will need a bag to put all your goodies in. There are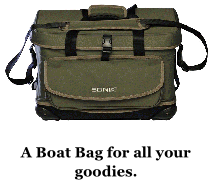 plenty to choose from on the market, ranging in price from a few pounds to the sky’s the limit. Most have separate compartments for reels and other accessories. Some have rigid frames and all should be waterproof - although some aren’t. Try to keep the top flap shut while fishing. It doesn’t help if it starts raining and you’ve left the top up. All your gear gets soaked and bag will start to smell.
FLY BOXES
I caught the vast majority of my fish over the years using just three flies. But those flies come in a variety of different sizes and colours. You need somewhere to keep them, along with all the other flies you will inevitably convince yourself that you can no longer live without! Believe me, a paper bag full of flies is not the best thing to find in your pocket when you least expect it!
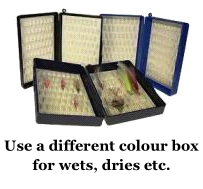 Fly boxes have two basic construction designs, one of wood and the other of plastic. The plastic ones tend to be smaller. Having tried both types over the years there is little to choose between them - they do what they are designed to do - keep your flies in one accessible place. Having said that, the plastic ones are designed to keep fewer flies, so the tendency is to have several of them and keep all your flies of one type in a separate box.
You end up with four or five boxes of flies - one with your wet flies, one with your boobies, razzlers etc., one with your buzzers, one with your nymphs, and so on. With a waterproof label on each box you will always know exactly where your flies are located. I bought boxes of different colours so that I knew that each colour contained a particular type of fly - blue was boobies, red was dries, etc. This is all well and good as long as you can remember which is which, or you'll end up opening each one until you find the one you want.
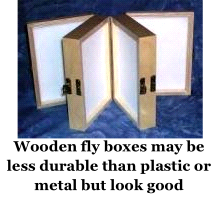 Wooden boxes are usually made of ply wood, which is fine as long as it's a water resistant plywood like marine ply. Unfortunately, you are not likely to find out if it is water resistant until it has been in use for some time and starts to warp or disintegrate. My box was a three section affair, opening like the leaves of a book. I would strip it down and re-varnish it during the winter - which also gave me the opportunity to go through my flies and discard the ones which were past their best. I would recommend you do the same.
FLOATANTS
The idea of a dry fly is to keep it floating on top of the water where it can be perceived by the fish as a fly sitting on the surface. The problem with this idea is that many materials that are perfect for making an artificial fly look really good are not waterproof. One dunk and they lose their shape or start to sink. The solution to this problem is to coat the fly with a water repellent before you start to use it. There are several types - liquid, spray or granules.
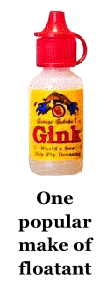 The liquid variety comes in a small squeezable bottle and you need the merest amount. Squeeze just put a single drop between finger and thumb and smooth gently over the fly. Too much and you risk turning your finely crafted dry fly into an amorphous lump of gunk. The spray version is used after each cast and the fly has been dried in a cloth. Again, just a short spray is all that is needed. Finally, the granules are used by dropping the fly into the tub and giving it a shake. The granules suck up all the moisture leaving the fly dry for its next adventure. Some use the granules and the spray or liquid together.
A final thought on floatants - if you start by using a material that floats anyway, none of this rigmarole is necessary. I tied up flies with a plastazote element in the body. No matter how hard you try to drown it the fly will always float. Add some cul de canard feathering, which is naturally waterproof, and you can virtually dispense with floatants. There are some people who will say this is sacrilege and that the perfect dry fly must be made out of materials that need assistance in the floatation department, but I'm a pragmatist - I simply do what works best!
SINKANTS
Where a floatant is used on a fly to make it float, the reverse is not true. A sinkant is actually used on the leade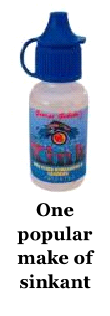 r, not the fly. The theory goes something like this: when you've got your dry fly floating prettily on the water, the last thing you want is a leader snaking its way across the surface to spoil the image. And where a dry fly seems to want to sink no matter what you do, the leader wants to float despite your best efforts to sink it out of sight. This is just another proof of Murphy's Law! The object, therefore, is to coat the leader in something that will make it sink. There are two varieties on offer, liquid and paste. The liquid version is something like washing up liquid in that it acts by breaking the surface tension of the water. This allows the leader to sink out of sight. Indeed, I know some fly fishermen who prefer to “borrow” some washing up liquid from the kitchen at home and use that in diluted form.
My initial thought was to solve this problem by using fluorocarbon line in my leaders. Fluorocarbon is denser than water and will sink under its own weight. But the problem is that fluorocarbon is so very much heavier than water that it starts to drag the fly under too! That is why, despite the superior qualities of fluorocarbon, it is still better to use monofilament in your leaders when dry fly fishing. Like floatants, the secret is to use as little as possible. Put just a drop between finger and thumb and rub your leader through it. The monofilament leader will then sink, but a lot slower than fluorocarbon. Remember one thing: floatants and sinkants are not compatible. Once you have degreased your line, wipe your hands before touching your fly or the sinkant will instantly turn your dry fly into a wet fly!
The paste version acts in a slightly different way. Made of fuller's earth, an earthy hydrous aluminium silicate, the paste absorbs grease and also acts to dull the shiny surface of the line. It is also quite dense so its weight will act to pull the line down. Again, just a scrape rubbed along the line is sufficient. Floatants and sinkants are only necessary when fishing a dry fly. Both concoctions are redundant when fishing sub-surface.
HARDWARE
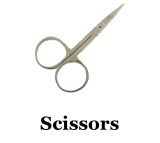
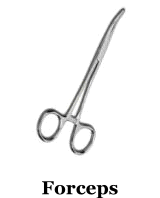 There are various pieces of hardware that you will need, including scissors, clippers and forceps - also sometimes called haemostats. Your scissors will be in near constant use and should be kept readily available. Most fishing jackets have a loop for them on the upper chest. By far the best way to keep this tool to hand is with the use of a zinger - a clip attached to a retractable cord which is then attached to your vest. This ensures that the scissors are not lost if you happen to drop them.
 Another piece of hardware that is used on a constant basis is a sharp pointed needle or bodkin. Some snippers come with a small needle built into them - which I found was too small and inaccessible for easy use. I keep a long needle with a handle on its own zinger. This is useful for clearing the eyes of hooks - especially cleaning out any glue that has collected in them during construction. It also proves of great value in helping to unravel the bird's nest that your leader will inevitably get into
 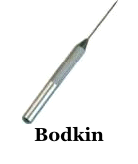 from time to time. And make sure you unpick those annoying wind knots that occur in your leader occasionally. They are inevitable but will seriously weaken your leader if left unattended. Again, this item will find a home somewhere on the front of your fishing vest, but remember it has a sharp point that should be sheathed when not in use - a cork or a plastic tube will fit the bill.
You might want to consider carrying a pair of toenail clippers in your bag. What on earth for? - I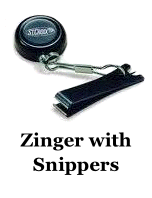 hear you ask. On several occasions - more than I would care to mention - I have been asked to assist in the removal of a fly imbedded in someone's arm, back, neck and various other parts of their anatomy. Of course, if there is a serious risk of permanent damage, for example if the fly is dangerously near a person’s eye, then you should seek professional medical assistance. The biggest problem in removing a hook is if the barb has become embedded. It is usually easier to push the hook through rather than pull it back out the way it went in. You can use the toenail clippers to snip the hook in half for removal. Wire snippers will do the job for more robust hooks.
I use two zingers and keep my scissors on the first and my small forceps and clippers on the second one. The clippers - like a small pair of nail clippers - are used to tidy up knots and perform small surgical operations on flies. This is kept on the same zinger as the small forceps with the use of a split ring. The forceps are used to assist in the removal of the hook from the fish's mouth - or wherever else a hook occasionally ends up. Even the best cast will sometimes go wrong and embed your fly in the back of your jacket - or worse. It is possible to click the forceps into a closed position which is really useful when doing surgery on a fly or tying it to the leader. Forceps are also available in extra long format. Occasionally you will catch a fish that has literally swallowed your fly and the only way to recover it is with the use of a full length pair of forceps, but these are only infrequently needed so are kept in the fishing bag.
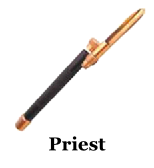 You will need to keep a priest handy. I've not gone all religious on you. A priest is the name of the blunt instrument that is used to knock the fish on the head and kill it as quickly and humanely as possible. There are many made of wood, bone and other assorted materials. I stand by the metal version that comes with a marrow spoon built in. At one end of this metal bar is a brass ball which will do the job of dispatching the fish quite efficiently. At the other end is a screw cap to which is attached a long thin spoon. The purpose of this spoon is to remove and examine the
 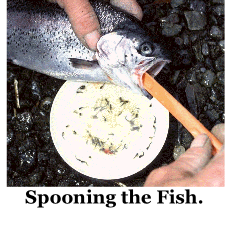 contents of the fish's stomach - useful in identifying what the fish has recently been feeding on. The spoon is inserted down the throat and into the stomach and then rotated before removing. It is a good idea to rinse the contents into a plastic container of water to assist in examining the produce. This will give you a good idea of what fly to use to match what the fish has been feeding on. In the illustration you can see that the fish has been feeding on buzzers and daphnia, so you should start thinking “buzzer imitations or something orange for the daphnia - or both!”
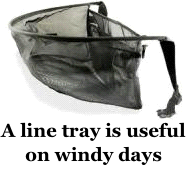 A line tray is as useful in a boat as on the bank. On a still day the line can be allowed to fall the floor in a boat. But once the wind gets up then the probability is that the line, especially the backing, will get blown about and find something to snag on. I mention in the chapter on Going Afloat that one of the ways to solve this problem is to wet the inside surfaces of the boat so that your line will stick to it rather than get blown about. This is all well and good in a mild wind but once the big blow comes along then that idea won't work. And I've caught some of my best fish in a gale - it seems to really get the monsters moving. That's the time to get the line tray out.
Make sure that the line tray sits comfortably on its belt. If it wasn't supplied with a belt then the web belt used to secure a suitcase makes a good substitute. A great idea I came across is to glue plastic whiskers into the base of the tray. About an inch or so long, they are made from heavy duty monofilament and are designed to stick up from the base of the tray. The line falls to the bottom of the tray and gets trapped among the whiskers. This stops the line moving about in the tray and eliminates the risk of the line becoming tangled. Incidentally, a line tray with a net base for drainage is the best choice in my opinion. I have seen some dedicated folk build a fixing mount for their line tray onto their boat seat so that the tray sits between their legs. A good idea, but it can become a bit wearing having to keep your legs in a particular position for an extended period of time.
On the bank, a line tray makes even more sense. Allowing your line to fall to the ground ensures that it will have a short life. It will pick up all sorts of abrasive materials, not to mention the snags that are just waiting there to ruin your day! Some people advocate holding the retrieved line in their lazy hand (the one not holding the rod) and letting go of it just before they start the next cast. While this sounds good in theory, it does mean that the line will spend a quite some time scrunched up in your hand, which will result in kinking of the line after a time. A line tray is the answer, especially if you are going wading, where any line will be washed downstream, float away if it floats or be impossible to cast if it sinks.
FISH FINDERS
 A certain amount of controversy has surrounded the use of fish finders in the sport of fly fishing - some say it is cheating. My view is that if you are going out in a boat you need all the help you can get. There is absolutely no doubt that the newcomer to the sport will spend many fruitless visits to the fishery until he learns the art of watercraft. Is it wrong to make use of a tool that will help to overcome those wasted times? My suggestion is - if you can afford one - get one as soon as you possibly can. It will open a whole new dimension to your fishing adventures. But don't imagine you can just cruise around looking for the fish on the monitor - it doesn't work like that.
Where a fish finder comes into its own is when looking for the drop-offs and gulleys that will hold fish in the right circumstances. A drop off is where a gentle sloping of the bottom of the lake quickly gets steeper and plunges down to the deeps. This rapid sloping is favoured by fish as it gives them an easy escape route from danger. A fish finder will help you build up a picture of the topography of the water underneath the boat and save time looking for the ten foot depth that is likely to hold fish. You would be surprised at how depths can vary, especially in reservoirs where the water is drawn off for consumption. What was a ten foot mark last time you visited might hold several feet less - or more - today.
When you have found a spot that is likely to be worthwhile remembering in the future, a good way to fix its location is with the old sailing aid of land marks. Find two points that line up in one direction - say a tree and power pylon. Then look in another direction and find another two points. This will locate your position for future reference. This method is great for finding shallow areas in otherwise deep water - a location that fish prefer because of the ease of escape to the deeper water. Alternatively, a GPS co-ordinate can be taken if you possess one these hand held devices, or a mobile phone with this facility.
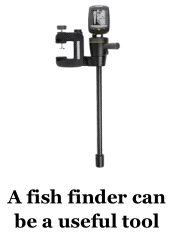
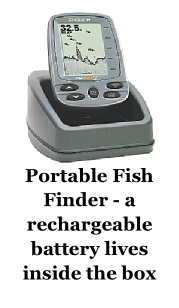 There are many varieties of fish finder, the simplest of which are all-in-one set-ups that attach to the gunwale of your boat with the use of a thumbscrew or clip. The one I used for many years had the transponder (the bit that goes in the water) mounted on a homemade extendable shaft which attached to the gunwale with a thumbscrew and was then connected to the machine by a wire. This enabled me to position the screen in front of my fishing position - a bit like watching TV while you fish! Make sure you get one where the battery is easily removed for charging but is kept in a watertight housing while in use.
For those unfamiliar with fish finders, it is essentially a machine that generates a pulse or click through its transponder – the bit in the water. This click passes through the water and bounces off anything it hits. The echo is picked up by the same transponder unit and the time delay since the transmission of the pulse is used to determine the distance of the object from the transponder. Originally they were designed to calculate the depth of water but they soon found use in locating fish. Different fish finders have different angles through which they send their pulse of sound. Some have a wide field, which are more effective in shallow water as they cover a wider area of the bottom. Others have a narrow beam which will be more effective at greater depths. When purchasing a fish finder make sure the angle of beam is suitable for the depths of water that you intend to fish. A narrow beam is good for shallow waters but will give little information about what is going on in deep water where its field of view will be just a small area of the bottom.
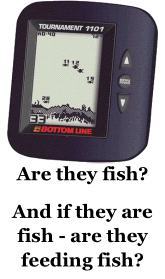 Remember one important thing - a fish finder does nothing more than tell you if fish are near your boat. It will not tell you if they are feeding or how to catch them! And don’t believe everything you see on a fish finder’s screen. The screen shown here looks exciting with fish hovering under the boat. But the chances are that fish like this aren’t feeding but are simply sitting in their comfort zone. Feeding fish are much more likely to be at or very near to the bottom. Additionally, you should understand that fish finders interpret the signal that is returned to the machine. Those juicy looking fish might just be some rubbish floating down in the water. It pays to be sceptical. I’ve spent years staring at screens like this and can honestly tell you that, even if they are fish, you are very unlikely to catch them around the mid-water mark in thirty three feet of water (the depth is shown in the bottom left of the screen). Head for the ten foot level and try again.
I have found that the best way to use a fish finder is to go to where your experience tells you the fish should be - for example at the ten foot mark on the upwind shore and then see what the fish finder shows. It may be necessary to turn off the boat engine and drift quietly for a few moments to allow the fish to settle down from your intrusion. Even if the finder shows nothing, I would still make a few casts where I thought the fish should be. Remember, the fish finder shows you what is directly under the boat and the fish could be just a few yards away, so a few casts are still worthwhile.
I have sometimes thought that fish may be affected by the pulse generated by the machine, but I have never found a way of proving it. It is probable that the click from the fish finder will be lost among all the other noise on a windy day when the waves are up, but I'm not so sure when there is a calm day. That click the fish finder sends out could be setting up your own little exclusion zone!
VESTS
Nothing identifies the fly fisherman from all other anglers more than the fishing vest. Despite its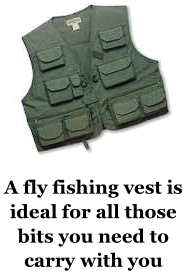 name, the fishing vest is an outer garment, looking something like a waistcoat, with many pockets and places to attach the bits and pieces that you will need. The idea is to carry as much equipment as possible in an easily accessible place. Like microwaves and dishwashers, you don't need one until you have tried it - then you wonder how you ever managed without it! Try to keep each item in your vest in the same place - it really does make things easier if you know where to look when you have your wet weather gear on top of your vest. The zingers will clip on each lapel, the leader material, fly boxes, floatant and sinkant, sun glasses, fishing license and a dozen other bits and pieces will all find their homes in your vest.
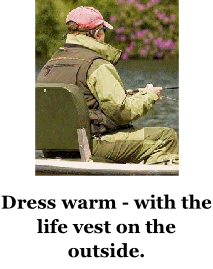
The latest makes of vest come with a floatation device built in. While this would seem like a really good idea there is one word of warning. In order for these devices to operate they must come into contact with the water. This might seem obvious but if you are wearing your wet weather gear over your vest when you go overboard or lose your footing in deep water, your waterproofs will impede the action of the floatation mechanism. It's no good wearing a floatation device and feeling protected if you then insulate it from the very circumstances in which it is designed to operate!
CLOTHING
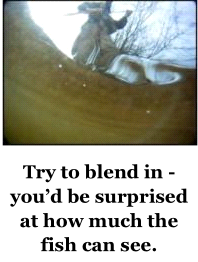 We all have a picture in our mind's eye of the fly fisherman, dressed in olive or brown gear and it is no accident that these colours are the choice of most. It's alright to stand out from the crowd most of the time but if the fish sees something unnatural then it will be off like a shot. You would be surprised just how wide the field of view is of a fish looking up through the water. The best thing to do is try and blend in with the background. Dress in layers according to the weather. It is easier to take off a layer as the day warms up and put it back on later. Waterproofs are now available in very thin material which also allows your perspiration to escape (called wicking). Keep the jacket and leggings rolled up in your bag for quick and easy access. Nothing ruins the day and makes you more miserable than getting caught in a sudden downpour without your waterproofs.
 Jeans are an item of clothing definitely to be avoided when fishing. They have very poor thermal qualities and are neither windproof nor water resistant. Moleskin or corduroy trousers are much more durable and thermally efficient. They also repel water initially rather than soaking it up.
Footwear should be given special attention. Cold, wet feet are the surest way to ruin your day, so trainers should be left at home. It is amazing how many places your fly line can find to hitch onto when casting, not least your shoe laces or boot hooks. Fleece lined Wellington boots have the advantage of having no external bits and pieces sticking out and will keep your feet warm and dry in all weathers. They will sit under your trousers and allow the rain to pass straight off your waterproofs when wearing them. The fleece lining will keep your feet cool in summer so they really are an all year round choice.
 If you limit your fishing activities to a boat, bank or landing stage then you'll have no need for waders. But in these locations you should still be careful about what you put on your feet. Some reservoirs allow fishing from the concrete bank retaining the water. This can become very slippery and should not be traversed wearing boots with metal studs, especially in icy conditions. Once you start slipping there is only one outcome - and I guarantee you won’t enjoy it!
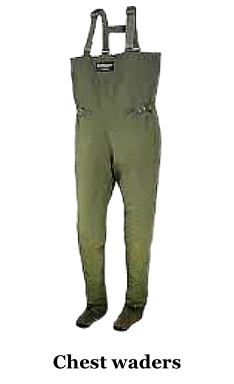
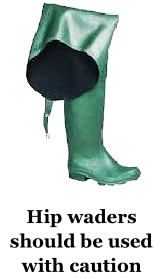
If, however you intend getting closer to your prey then a good pair of waders in an essential item. These come in two main formats, hip boots and chest waders. Hip boots are like extra long Wellington boots and usually have a clip and braces so that they can be attached snugly to a belt to stop them falling down. The assistance they offer when wading can sometimes be deceptive, as you may often find yourself trying to wade just a little deeper than hip boots will allow. Remember that the boat you can see in the distance is creating a wake that will eventually visit you. What was a safe depth suddenly becomes just a little too deep when that wave arrives. The watchword is to be constantly conscious of what is going on around you.
 Chest waders offer more versatility but caution should still be the watchword. In streams and rivers you will be surprised at the force of the water around your legs. There is always a potential danger of losing your footing and being swept downstream. Always have a wading stick or long handled landing net with you to act a stabiliser and use it to investigate the bottom before you step forward. Ensure that the waders you purchase are breathable to avoid perspiration and discomfort during use. They are more expensive, but worth it.
Chest waders come with either a stocking foot or with boots built in. The preference here should be for the stocking foot variety as these enable y ou to use a wading boot. This is a more durable and comfortable alternative, as it can be laced up like a normal walking shoe. This becomes even more important if you intend doing a fair amount of walking to and from your fishing venue. Finally you can choose between a sole with felt or studs. The felt is best for slippery rocks or choose the studs for traction in mud. You pay your money and take your choice! It’s good to know what the water is telling you when you’re wading - this video will give some clues what to watch for.

Sunglasses are another essential item. Polarized lenses will enable you to see much more of the water through the surface glare. On many occasions you will spot a fish holding in the river or stream with the use of polarised sunglasses that you would otherwise have missed. If, like me, you have to wear prescription glasses then look for the polarized sunglasses that are made oversize and will fit over the top of your normal glasses. A scarf is a must in my view. A cold wind on the back of your neck will soon become wearisome. Worn like a cravat and tucked inside your shirt, a scarf will give great thermal protection on even the coldest day. Go for a towelling scarf like those available through most quality sportswear suppliers.
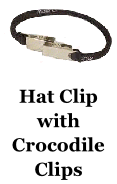 A hat is absolutely essential. Finding out you have sunstroke after the fact is no fun and is easily avoided with the use of a hat. While my preference is for a wide brim like a fedora or bushrangers hat, many will prefer a baseball type cap, although that will not protect the back of your neck from sunburn. As long as a hat protects you from a fierce sun then it is doing its job. Remember also that you lose the majority of your body heat through the top of your head, so a hat is equally important in cold weather. In a high wind even the snuggest hat can decide to go flying. I found a neat little gizmo made of a short piece of cord with small crocodile clips at each end. One clip attaches to the back of your hat and the other attaches to your collar. Even if your hat flies off it won't be going anywhere.
 I am a strong proponent of fingerless gloves. The neoprene variety are simply the best. They will keep your hands warm, even when constantly wet. They have the added advantage of giving extra grip on the rod for casting. For those really cold days when you probably should be elsewhere but just can't help yourself, then a pair of padded gloves will slip over your fingerless gloves for even more protection from the cold.
As a final step, I use the charcoal fired warming box or the chemical warming packs that sit in your pocket and stay hot for hours. Pop your hands on them while waiting for your flies to sink to the depths where the fish are likely to be in this weather. Don’t forget to extinguish the charcoal based offerings at the end of the session!
 Finally, at the other end of the year, for those warmer times when the midges won't leave you alone, it pays to have a head net tucked in your pocket. This looks like a big fine meshed net bag with the opening elasticated or with a draw string. You pop it over your head when the flies decide its meal time and you're on the menu. For the rest of your exposed parts a fly repellent is in order. Try to use a deet based offering which is more environmentally friendly. Indeed, in some areas the deet based repellent is the only one permitted.
